5 Top How To Make Interchangeable Welcome Sign Cricut
I made them long enough to go across all three boards at 9 inches each. Get the cut file for design space and see the wr. And for patriotic occasions like memorial day and the 4th of july: Round off the corners of the frame backing as needed to fit it into the frame.

Diy Seasonal Home Sign With The Cricut Knife Blade Everyday Jenny from www.everydayjenny.com
How to make interchangeable welcome sign cricut. I love being able to decorate for the seasons without having to store tons of different pieces. In your welcome sign design, click shapes and select star. I measured the area next to our door and found a piece of wood that would fit nicely. Repeat this process for all four pieces of the welcome sign stencil.
Let me show you how i did it. This velcro worked great for this project. Seven for the lettering and 2 more for spacing at the top and bottom. Create the design out of cricut stencil material, apply it to the wood and then paint over it.
This time of year seems to fly by so fast i wanted an easy change for the seasons and holidays. Seasonal welcome door sign interchangeable welcome to our home hanging sign round wood front door sign with burlap bow with 14 seasonal ornament for st patrick's day easter holiday porch decor (brown) 4.8 out of 5 stars 30. Make sure to only place glue on the bottom of the rack that goes on the truck. Supplies needed for this interchangeable sign:
In this video, see how to give visitors a warm greeting—with a custom welcome sign created with vinyl! This is where the backing piece will fit into. Wine bottle crafts mason jar crafts mason jar diy diy home decor projects craft projects craft ideas diy ideas decor ideas pallet projects. Let me show you how i did it.
June 22, 2020 | contributor: Article by my silly squirts. So when i saw these cute wood welcome signs with interchangeable pieces i knew i wanted to find a way to create my own version for my entry way. Once your pieces are all ready, you will want to adhere them to the sign with wood glue.
Interchangeable for holidays ez welcome sign. My full disclosure policy is boring, but you can find it here. Change the color of the star to match the color of your letters (in my case, to black). All the letters and elements in the designs are ungrouped in the svg files, so you can easily rearrange them to fit a sign that has different dimensions.
Glue your sign with wood glue. Our front door was needing a new welcome to our home sign and i wanted to make it interchangeable for the changing seasons and holidays coming up rapidly at summer's end. This adorable sign shows off the best of both worlds, paint and wood. 5% coupon applied at checkout save 5% with coupon.
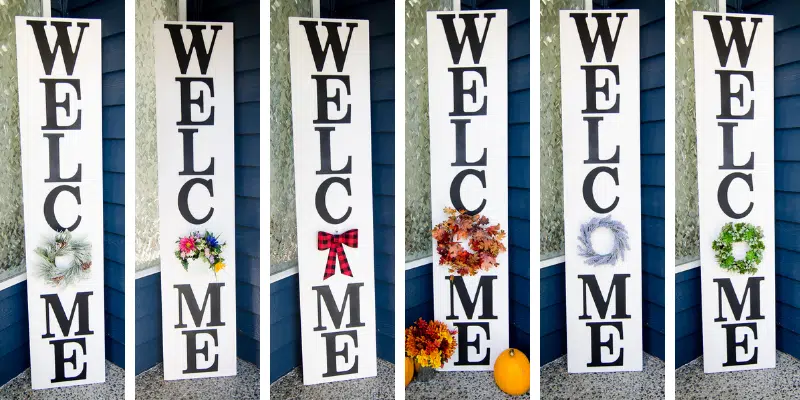
Here's the sign for christmas: Instead of using stencils or a cricut i went to dollar general and purchased six 4″ wooden letters. I finally decided that a vertical welcome sign with my cricut maker would do the trick. How to cricut episode 5:
Be sure to flip the mat over and peel the mat off of your stencil to reduce curl and damage to your vinyl. Before the paint dries, carefully peel the stencil up with the piercing tool and voila! I left a slight gap in between the boards before gluing (and nailing. I am sharing how you can make a welcome sign to sit on your porch or really anywhere you would like.
Follow along using just a few materials and household items to complete this simple diy home project for your door, garden, kitchen, or any other […] Cut as many as you want to make into different signs. Using your router with a 1/2″ bit, make a rabbet around the inside of the back of the frame. Here's the welcome sign for easter:
Make a welcome sign for your porch or any other type of sign you can imagine! 5 out of 5 stars (4) 4 reviews $ 5.00. While that was drying, i got out my cricut machine to create the lettering. Get the free design at my resource library here.
You want the top left open to place your tree and pumpkin. I finally decided that a vertical welcome sign. Interchangeable reversible welcome sign svg cricut maker compatible holdthesugar. Penni lauren photography via rustic wedding chic
To prevent bleeding, paint the first coat the same color as the background, then use your desired color on top. #cricutathome #cricutcreated slay at home mother cleaning hacks, diy projects, and organization for moms on a budget. After a summer of not having a lot of time to craft i. Learn how to make this wood home sign with interchangeable pieces using your cricut maker and knife blade!
To determine what size i wanted the lettering to be, i measured my piece of wood and divided that number by 9. I love decorations that i can keep out all year. Alternatively, you can use a foam brush and pounce the first coat of your desired color versus using a stroking motion. Our front porch is more of a stoop than a porch.
After the paint has dried, remove the stencils and attach a piece of velcro in the spot where the shapes will go. Drag the star over under the first letter and resize it smaller (you can decide what size you want to make it). Colorful wood beads (available at dollar tree) jute twine. Place a flat board on top and weights.
Transfers can be washed with water and reused! Learn how to make a welcome home sign with interchangeable pieces for every season to year round fun! Next, load your mat into your cricut cutting machine and click the go button. After the first piece of your stencil has finished cutting remove it from the mat.
Check out our cricut welcome sign selection for the very best in unique or custom, handmade pieces from our signs shops. The 2 pieces on the back were cut from 1 (common: Make sure to use permanent outdoor vinyl for the wood signs. Follow the instructions on your brand of wood glue for the best results.
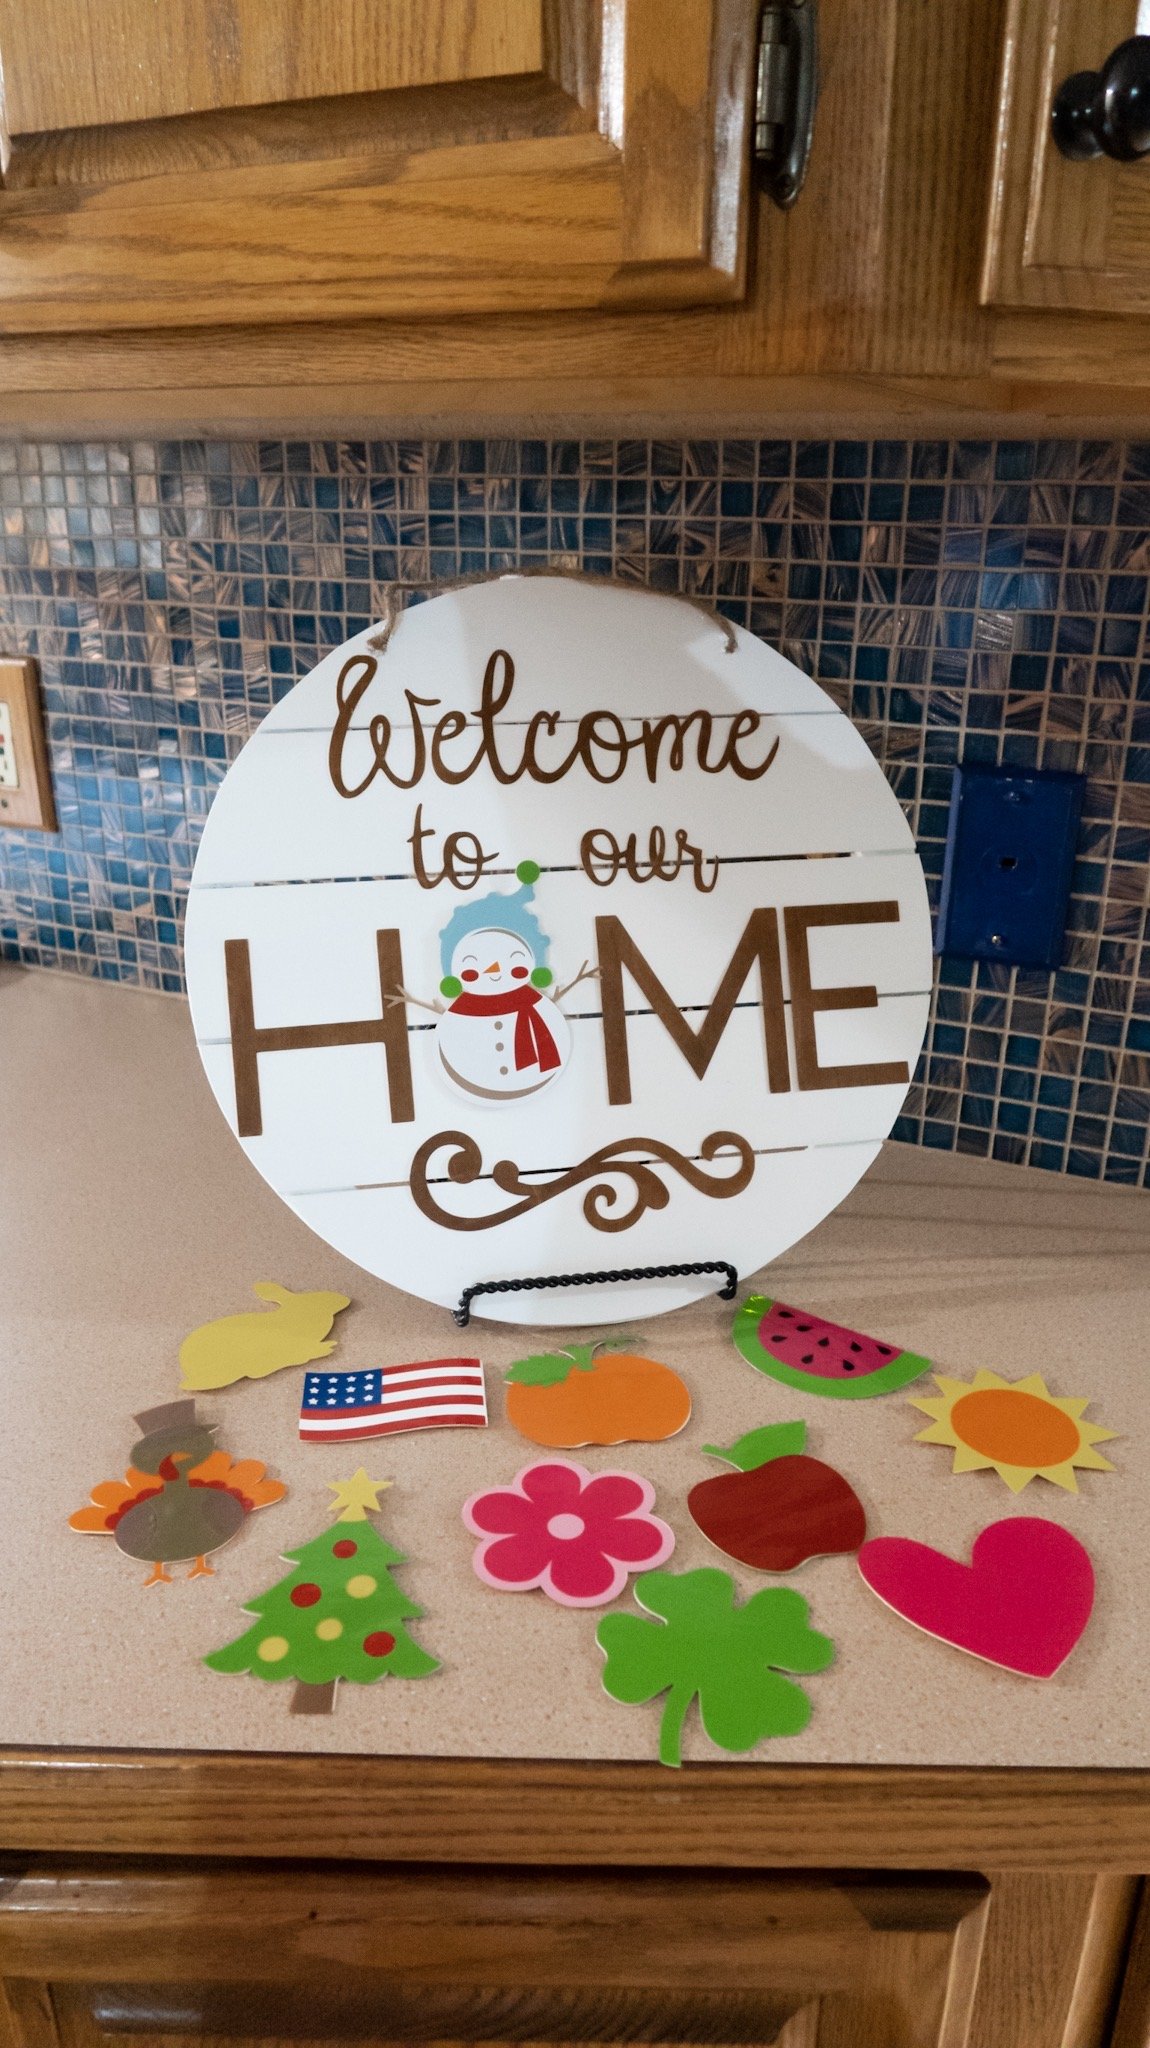
Chipboard (i used cricut brand 2 mm) scrapbook paper (i like to get the single sheets of patterned paper from hobby lobby @4/$1) felt. This post probably contains affiliated links. You will glue down the letters h, m & e leaving a space for the interchangeable pieces where the o goes. Learn how to group and ungroup images, match layer colors, and attach layers to secure placement.
1) paint each wood cutout how you would like 2) apply letter transfers to the wood box frame 3) squeegee chalk paste on to the box frame and peel off immediately. 4) use velcro to adhere each cutout to the sign 5) attach velcro pieces to the back of the sign to hold the.
 No Tools Diy Front Porch Welcome Home Sign With Changeable O Youtube
Diy Seasonal Home Sign With The Cricut Knife Blade Everyday Jenny
 Seasonal Welcome Sign Etsy Crafts Diy Crafts Cricut Crafts
 Welcome Seasonal Sign With Interchangeable Images Tidbits And Tinkerings
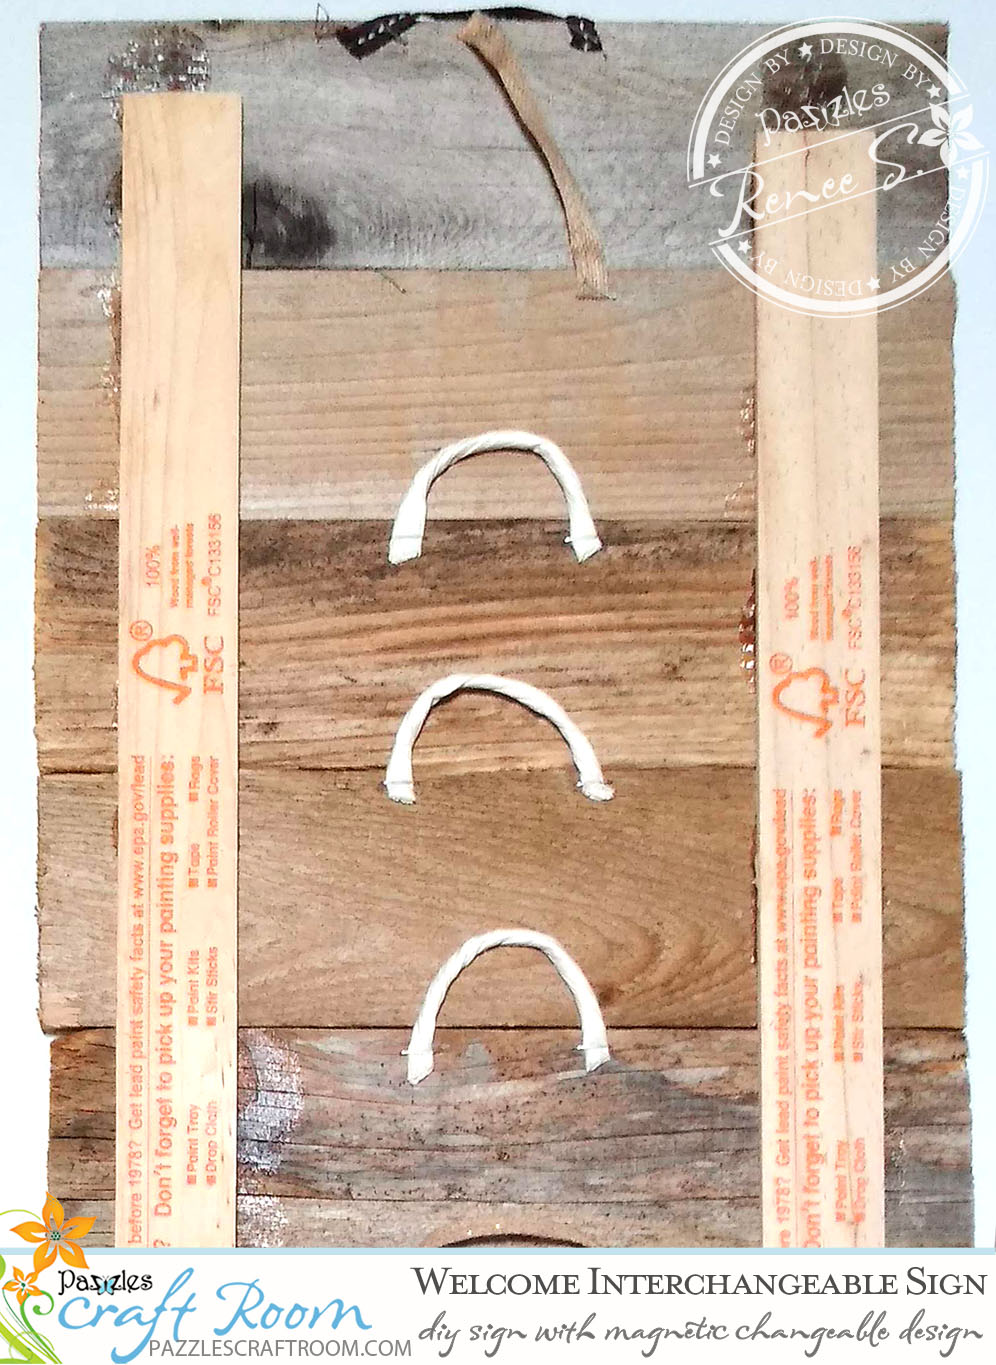 Diy Welcome Interchangeable Sign With Instant Svg Download Pazzles Craft Room
 Easy Diy Welcome Sign Perfect For Seasonal Attachments Door Signs Diy Porch Welcome Sign Welcome Signs Front Door
 Diy Home Sign With Interchangeable Pieces Slay At Home Mother
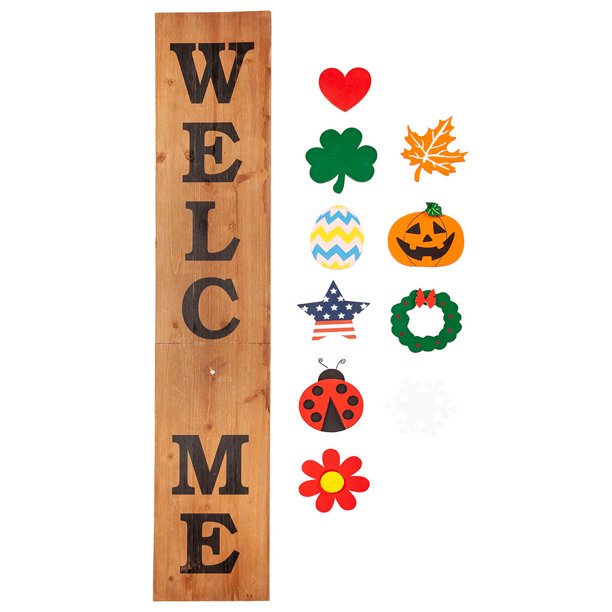 Fox Valley Traders Folding Wooden Welcome Sign Including 10 Interchangeable Holiday Shapes With Magnets Walmart Com Walmart Com
 Diy Interchangeable Seasonal Welcome Sign Allmomdoes
Diy Seasonal Home Sign With The Cricut Knife Blade Everyday Jenny from www.everydayjenny.com
I designed the signs to approximately fit wood signs of size 10 inches width by 48 inches height.
How to make interchangeable welcome sign cricut. I love being able to decorate for the seasons without having to store tons of different pieces. In your welcome sign design, click shapes and select star. I measured the area next to our door and found a piece of wood that would fit nicely. Repeat this process for all four pieces of the welcome sign stencil.
Let me show you how i did it. This velcro worked great for this project. Seven for the lettering and 2 more for spacing at the top and bottom. Create the design out of cricut stencil material, apply it to the wood and then paint over it.
This time of year seems to fly by so fast i wanted an easy change for the seasons and holidays. Seasonal welcome door sign interchangeable welcome to our home hanging sign round wood front door sign with burlap bow with 14 seasonal ornament for st patrick's day easter holiday porch decor (brown) 4.8 out of 5 stars 30. Make sure to only place glue on the bottom of the rack that goes on the truck. Supplies needed for this interchangeable sign:
In this video, see how to give visitors a warm greeting—with a custom welcome sign created with vinyl! This is where the backing piece will fit into. Wine bottle crafts mason jar crafts mason jar diy diy home decor projects craft projects craft ideas diy ideas decor ideas pallet projects. Let me show you how i did it.
June 22, 2020 | contributor: Article by my silly squirts. So when i saw these cute wood welcome signs with interchangeable pieces i knew i wanted to find a way to create my own version for my entry way. Once your pieces are all ready, you will want to adhere them to the sign with wood glue.
Interchangeable for holidays ez welcome sign. My full disclosure policy is boring, but you can find it here. Change the color of the star to match the color of your letters (in my case, to black). All the letters and elements in the designs are ungrouped in the svg files, so you can easily rearrange them to fit a sign that has different dimensions.
Glue your sign with wood glue. Our front door was needing a new welcome to our home sign and i wanted to make it interchangeable for the changing seasons and holidays coming up rapidly at summer's end. This adorable sign shows off the best of both worlds, paint and wood. 5% coupon applied at checkout save 5% with coupon.
Here's the sign for christmas: Instead of using stencils or a cricut i went to dollar general and purchased six 4″ wooden letters. I finally decided that a vertical welcome sign with my cricut maker would do the trick. How to cricut episode 5:
Be sure to flip the mat over and peel the mat off of your stencil to reduce curl and damage to your vinyl. Before the paint dries, carefully peel the stencil up with the piercing tool and voila! I left a slight gap in between the boards before gluing (and nailing. I am sharing how you can make a welcome sign to sit on your porch or really anywhere you would like.
Follow along using just a few materials and household items to complete this simple diy home project for your door, garden, kitchen, or any other […] Cut as many as you want to make into different signs. Using your router with a 1/2″ bit, make a rabbet around the inside of the back of the frame. Here's the welcome sign for easter:
Make a welcome sign for your porch or any other type of sign you can imagine! 5 out of 5 stars (4) 4 reviews $ 5.00. While that was drying, i got out my cricut machine to create the lettering. Get the free design at my resource library here.
You want the top left open to place your tree and pumpkin. I finally decided that a vertical welcome sign. Interchangeable reversible welcome sign svg cricut maker compatible holdthesugar. Penni lauren photography via rustic wedding chic
To prevent bleeding, paint the first coat the same color as the background, then use your desired color on top. #cricutathome #cricutcreated slay at home mother cleaning hacks, diy projects, and organization for moms on a budget. After a summer of not having a lot of time to craft i. Learn how to make this wood home sign with interchangeable pieces using your cricut maker and knife blade!
To determine what size i wanted the lettering to be, i measured my piece of wood and divided that number by 9. I love decorations that i can keep out all year. Alternatively, you can use a foam brush and pounce the first coat of your desired color versus using a stroking motion. Our front porch is more of a stoop than a porch.
After the paint has dried, remove the stencils and attach a piece of velcro in the spot where the shapes will go. Drag the star over under the first letter and resize it smaller (you can decide what size you want to make it). Colorful wood beads (available at dollar tree) jute twine. Place a flat board on top and weights.
Transfers can be washed with water and reused! Learn how to make a welcome home sign with interchangeable pieces for every season to year round fun! Next, load your mat into your cricut cutting machine and click the go button. After the first piece of your stencil has finished cutting remove it from the mat.
Check out our cricut welcome sign selection for the very best in unique or custom, handmade pieces from our signs shops. The 2 pieces on the back were cut from 1 (common: Make sure to use permanent outdoor vinyl for the wood signs. Follow the instructions on your brand of wood glue for the best results.
Chipboard (i used cricut brand 2 mm) scrapbook paper (i like to get the single sheets of patterned paper from hobby lobby @4/$1) felt. This post probably contains affiliated links. You will glue down the letters h, m & e leaving a space for the interchangeable pieces where the o goes. Learn how to group and ungroup images, match layer colors, and attach layers to secure placement.
1) paint each wood cutout how you would like 2) apply letter transfers to the wood box frame 3) squeegee chalk paste on to the box frame and peel off immediately. 4) use velcro to adhere each cutout to the sign 5) attach velcro pieces to the back of the sign to hold the.
No Tools Diy Front Porch Welcome Home Sign With Changeable O Youtube Diy Seasonal Home Sign With The Cricut Knife Blade Everyday Jenny Seasonal Welcome Sign Etsy Crafts Diy Crafts Cricut Crafts Welcome Seasonal Sign With Interchangeable Images Tidbits And Tinkerings Diy Welcome Interchangeable Sign With Instant Svg Download Pazzles Craft Room Easy Diy Welcome Sign Perfect For Seasonal Attachments Door Signs Diy Porch Welcome Sign Welcome Signs Front Door Diy Home Sign With Interchangeable Pieces Slay At Home Mother Fox Valley Traders Folding Wooden Welcome Sign Including 10 Interchangeable Holiday Shapes With Magnets Walmart Com Walmart Com Diy Interchangeable Seasonal Welcome Sign Allmomdoes